RFP to Submission — A Walkthrough
Step-by-step: take a docx RFP from your desktop through fit evaluation, brief generation, drafting, team review, and submission — with the relevant Grantable surface at each stage.
- Before you start
- Stage 1: Drop the RFP into a chat
- Stage 2: Ask for the fit evaluation first
- Stage 3: Generate the Grant Opportunity Brief
- Stage 4: Extract the checklist
- Stage 5: Set up the pipeline entry
- Stage 6: Draft against the checklist
- Stage 7: Team review
- Stage 8: Final pass and submission
- Where the time actually goes
8 min
reading time
Interactive knowledge check
RFP to Submission — A Walkthrough
You’ve got the RFP. Maybe you downloaded it from the funder’s grant portal, maybe they emailed it directly, maybe you found it on their website — either way, it’s a docx file on your desktop with all the questions, eligibility criteria, narrative requirements, budget format, and submission instructions. The traditional next step is reading 14 pages carefully to extract every requirement, opening the funder’s website for context, pulling up old proposals to see what’s worked before, and only then starting to draft. Most grant writers spend a third of their time on extraction and research that the AI can do in five minutes.
This lesson is a step-by-step walkthrough of doing it the Grantable way instead. Open the lesson in one tab and Grantable in another; we’ll go through each stage with the surface you’ll be looking at, the words you’ll type, and what you should expect to see back.
Before you start
You’ll want three things in place:
- The RFP as a docx (or PDF) on your desktop. Whatever format the funder publishes; Grantable can read both.
- Your Org Profile filled out in
/Library(covered in Module 1). The fit evaluation only works as well as the profile it’s evaluating against. - About 90 minutes of focus to get from the docx to a first-draft Grant Opportunity Brief plus a checklist. The drafting work that follows takes longer, but those 90 minutes set up everything that follows.
Stage 1: Drop the RFP into a chat
Open Grantable. Start a new chat. At the bottom of the chat input bar there’s a small attachment icon — click it (or just drag the docx file onto the chat input area). The file uploads and shows up as an attachment chip.
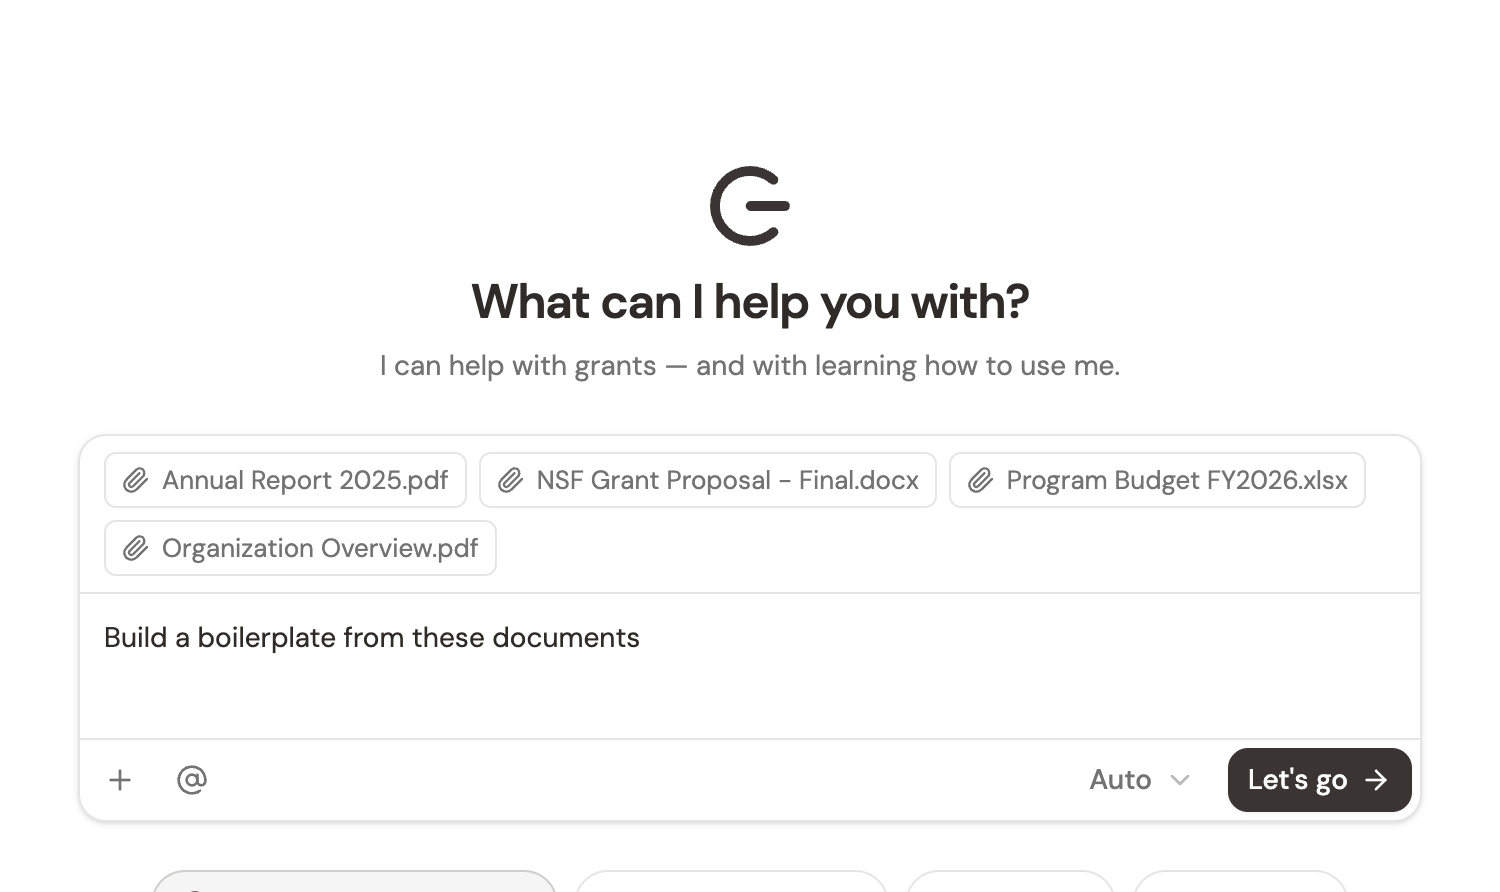
Don’t type anything yet. The attached file is now in the chat’s context — Grantable can read it, quote from it, extract from it. Adding a prompt below tells the AI what to do with it.
This is the same mechanic you’d use for any document you want the AI to work with: a board memo, an evaluation report, a prior proposal. The RFP is just the most common case.
If the RFP arrived in your workspace inbox instead of as a downloaded file (some funders send guidelines directly to the addresses they have on file), open the email and click Send to Chat. The email body and any attached PDFs land in the same kind of chat with the same context. Either path works.
Stage 2: Ask for the fit evaluation first
Now type — but don’t ask for a draft yet. Ask for the go/no-go evaluation:
“Read this RFP and evaluate fit against our org profile in /Library. Tell me whether we should pursue, what the strongest alignment is, what risks or gaps you see, and what we’d need to be ready to submit.”
Grantable opens the RFP, opens your Org Profile, and walks the comparison. You’ll see it work through the alignment — usually three to five points — name any specific gaps (eligibility issues, missing financial criteria, geographic restrictions), and end with a recommendation.
The whole pass takes a couple of minutes. Read what comes back; don’t trust it blindly. The AI is screening, not deciding.
This is the moment of highest-value triage. If the answer is no-go and you trust the reasoning, you’ve just saved yourself a week of misdirected drafting. If the answer is go, the evaluation itself becomes the seed of your strategic framing — the alignment points are usually what your proposal should lead with.
If you want to slow down here, ask follow-ups: “Pull the funder’s recent grantees and tell me whether our scale fits.” “What did our 2024 proposals to similar funders emphasize?” “Is there anything in the RFP that contradicts our standard outcomes framing?” The AI can search the workspace and the funder data without you opening another tab.
Don’t skip this stage to save time. Drafting before deciding to apply is the most expensive way to use the AI’s hours — you’ll generate a 2,000-word narrative for a funder you shouldn’t pursue. The five-minute fit check is the highest-yield thing in this entire workflow.
Stage 3: Generate the Grant Opportunity Brief
If you’re going forward, type:
“/grant-writing — generate a Grant Opportunity Brief for this RFP. Include the Decision Matrix and a recommended approach.”
The /grant-writing skill activates. Grantable creates a new file in /Applications/[Year]/[Funder Name]-[Program]/ containing the brief — funder overview, alignment summary, the Decision Matrix scoring this opportunity across mission, geography, capacity, and history dimensions, and a recommended approach section that suggests what your proposal should emphasize.
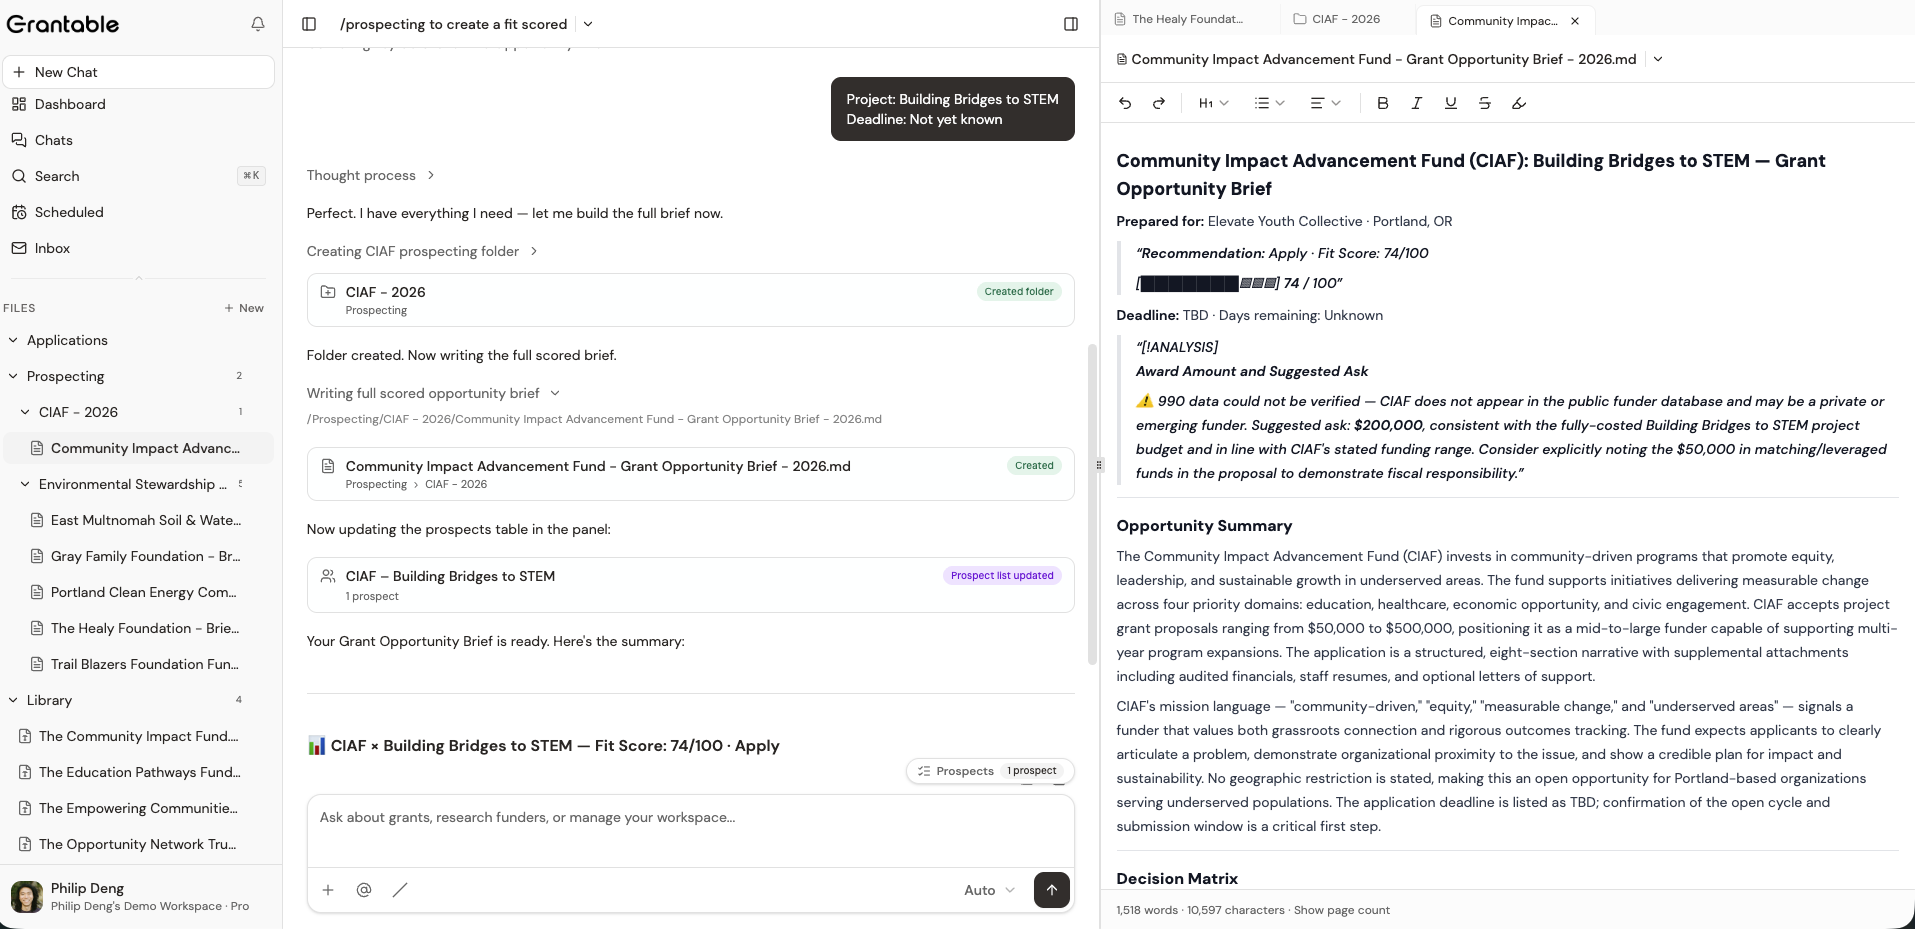
The brief opens in the context panel on the right. Read it. Edit it inline if you disagree with anything — the AI’s recommended approach is a starting point, not gospel. Add the qualitative context the AI doesn’t have: a relationship with the program officer, an internal capacity question, a board priority that bears on the decision.
This is the artifact you’ll share with leadership when you ask for the go-ahead. It’s also the artifact the AI will reference back to during drafting, so what you put into it shapes what comes out later.
Stage 4: Extract the checklist
In the same chat, type:
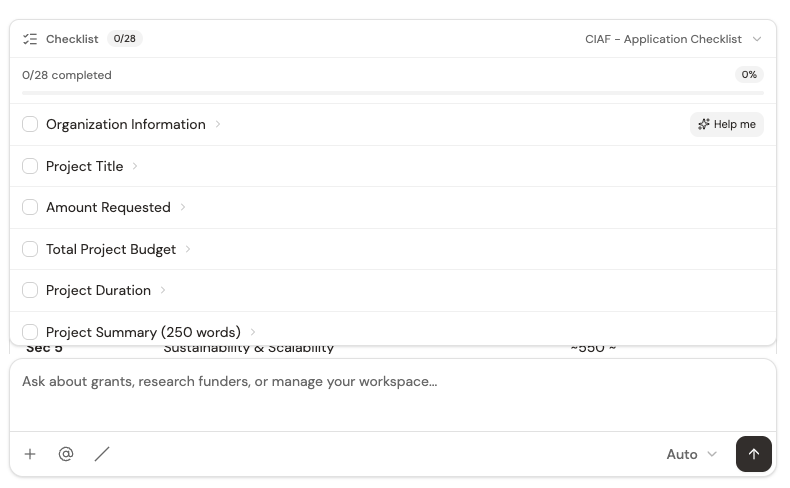
“Now extract the requirements from this RFP as an interactive checklist. Group by section: narrative questions, attachments, formatting, submission steps.”
A checklist file appears in the same Application folder. Each requirement becomes a trackable item. As you complete sections during drafting, you check items off and the progress bar advances.
The checklist is your spine for the rest of the work. Print it if you want a physical reference, but the live version in the workspace is what counts — both the AI and your team will reference it.
Stage 5: Set up the pipeline entry
The dashboard reads file metadata to surface grants. Right now your new application has its folder and files but no metadata, so it’s not yet showing in the dashboard. Two ways to fix that:
Option A — tell the AI in chat:
“Mark this application as in_progress with a due date of June 15 and an ask amount of $75K.”
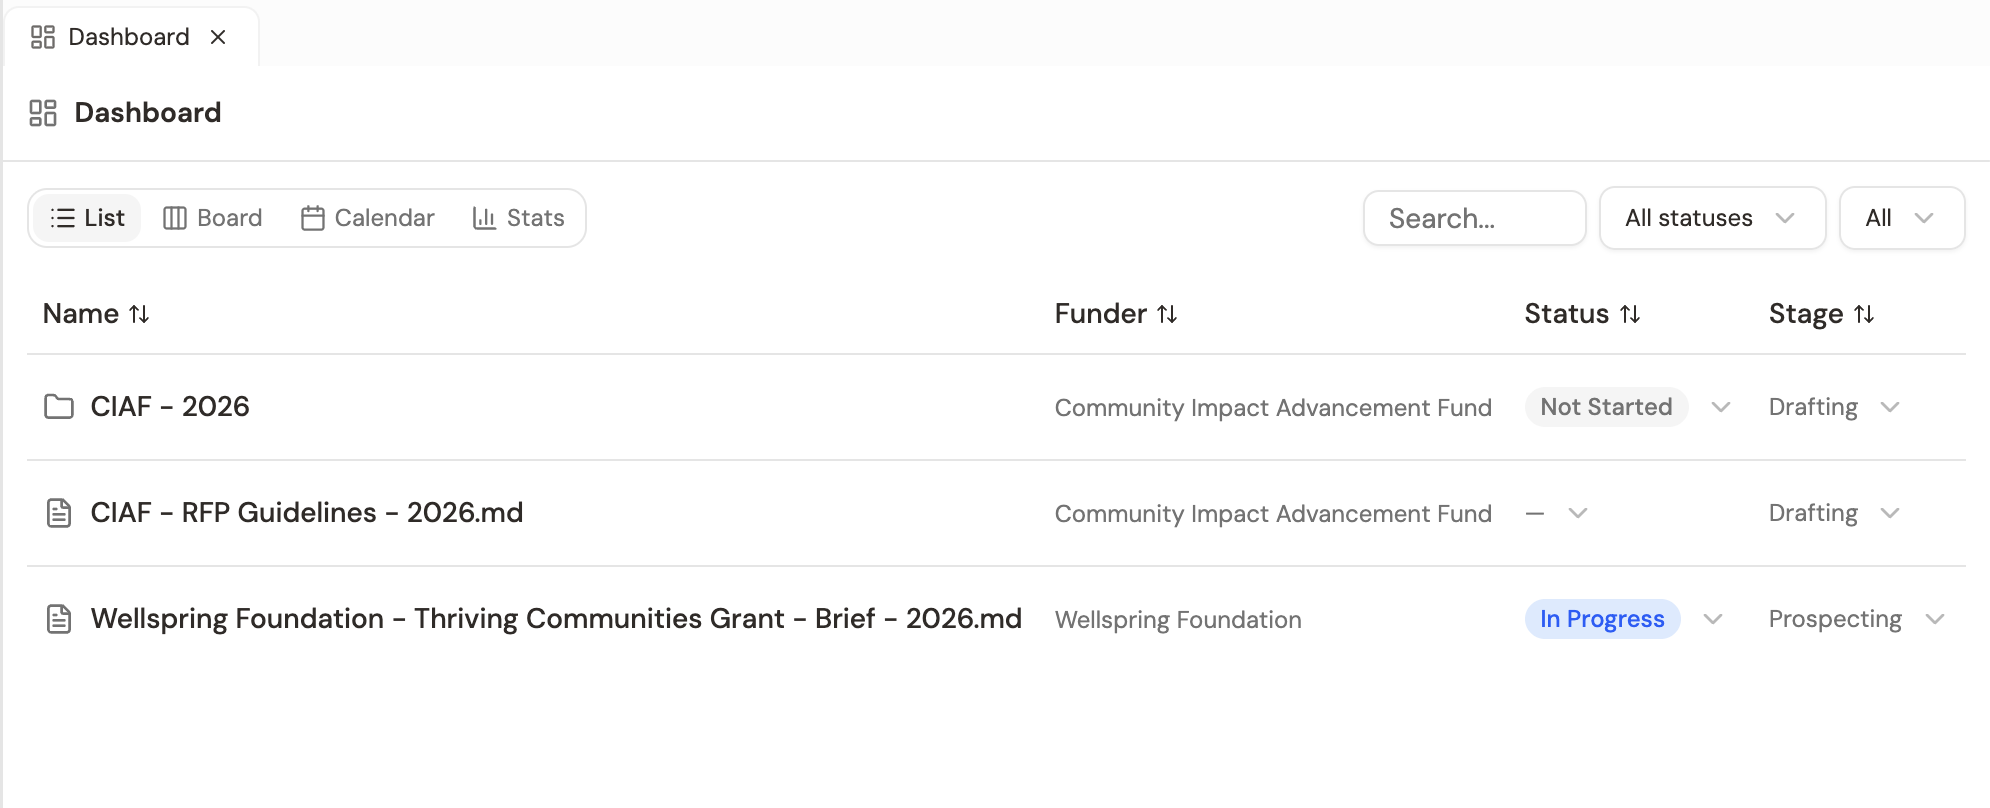
Option B — open the dashboard, find the row, and edit the cells inline. Status is a dropdown, due date is a calendar picker, ask amount is click-to-edit text.
Either path takes 30 seconds. The moment the metadata is set, the row appears in the dashboard list view with the right status, the calendar view plots the deadline, and the kanban view shows the card in the In Progress column.
This is what makes the deadline visible to your team. Everything else in this workflow is solo work the AI is helping with; the dashboard entry is the moment it becomes shared.
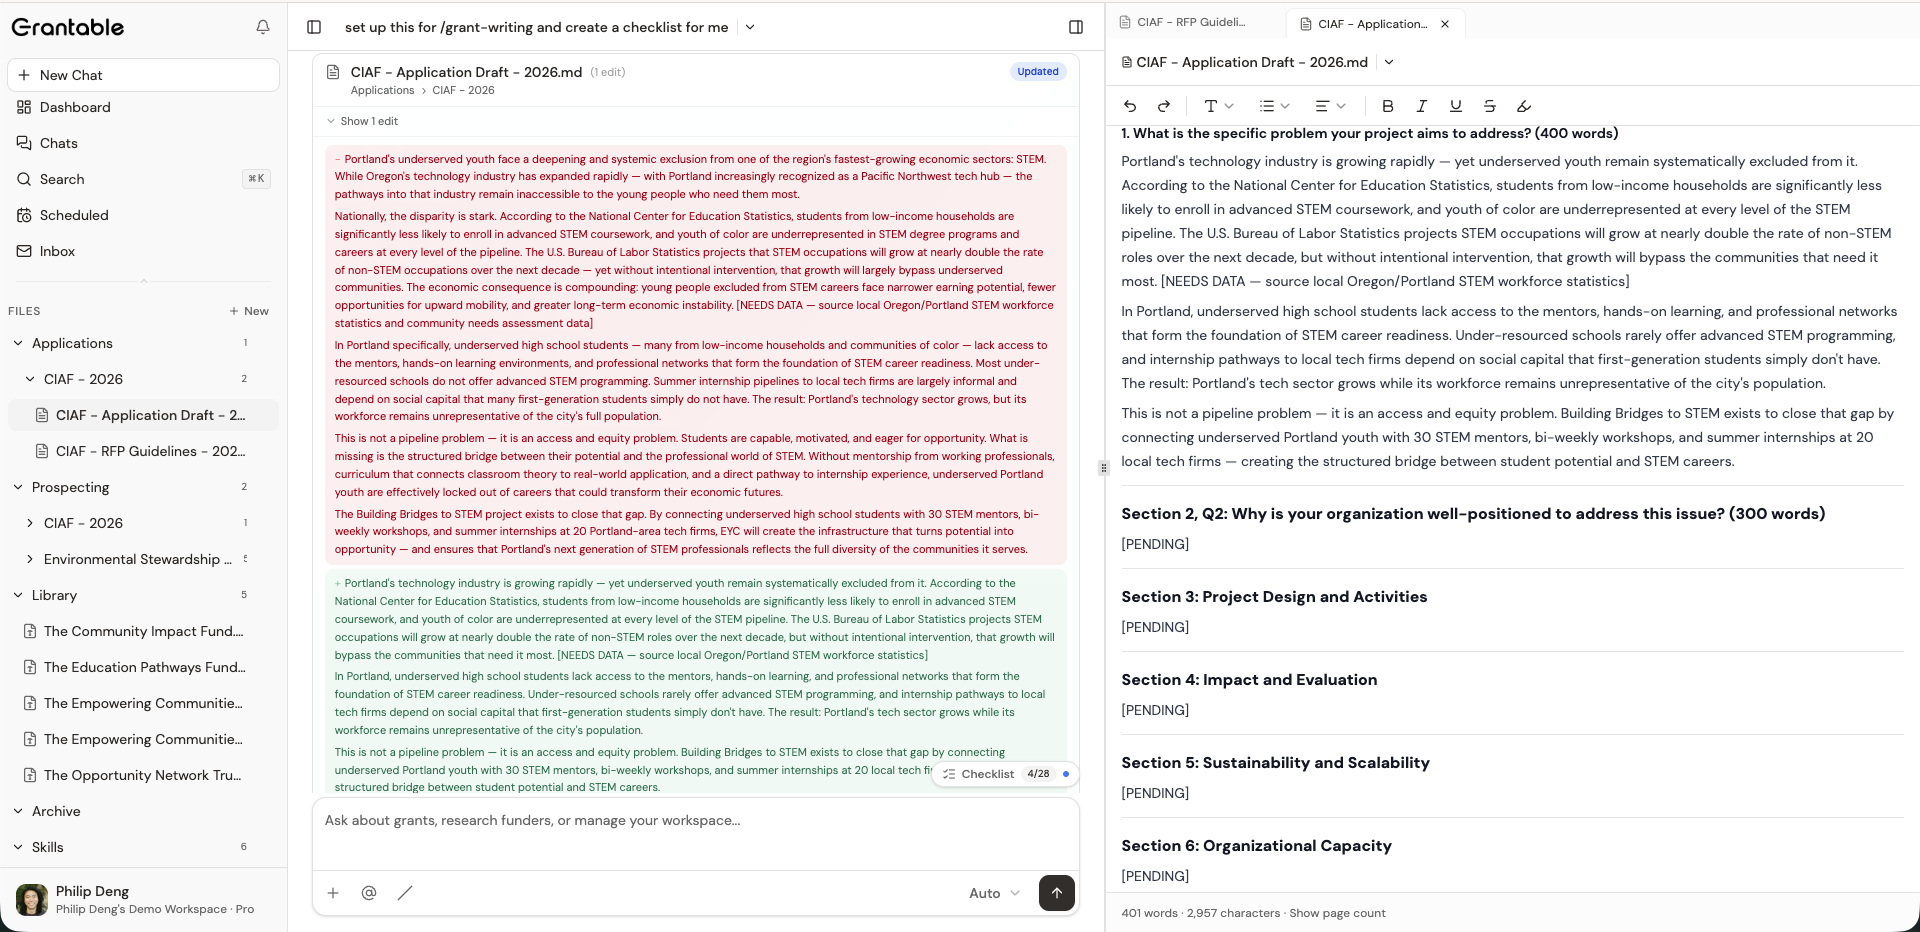
Stage 6: Draft against the checklist
Open the checklist. Pick the first section — usually the project narrative or the executive summary. Open a fresh chat (or continue the existing one), and type something like:
“Draft the project narrative section for this RFP. The funder cares about [whatever the brief surfaced]. Pull language from our 2024 NEA proposal in /Applications/2024/NEA-Arts-Education for the activities framing — that proposal won and the funder profile here is similar.”
Grantable drafts. The draft lands as a file in the application folder, opens in the context panel on the right, and the chat continues so you can revise.
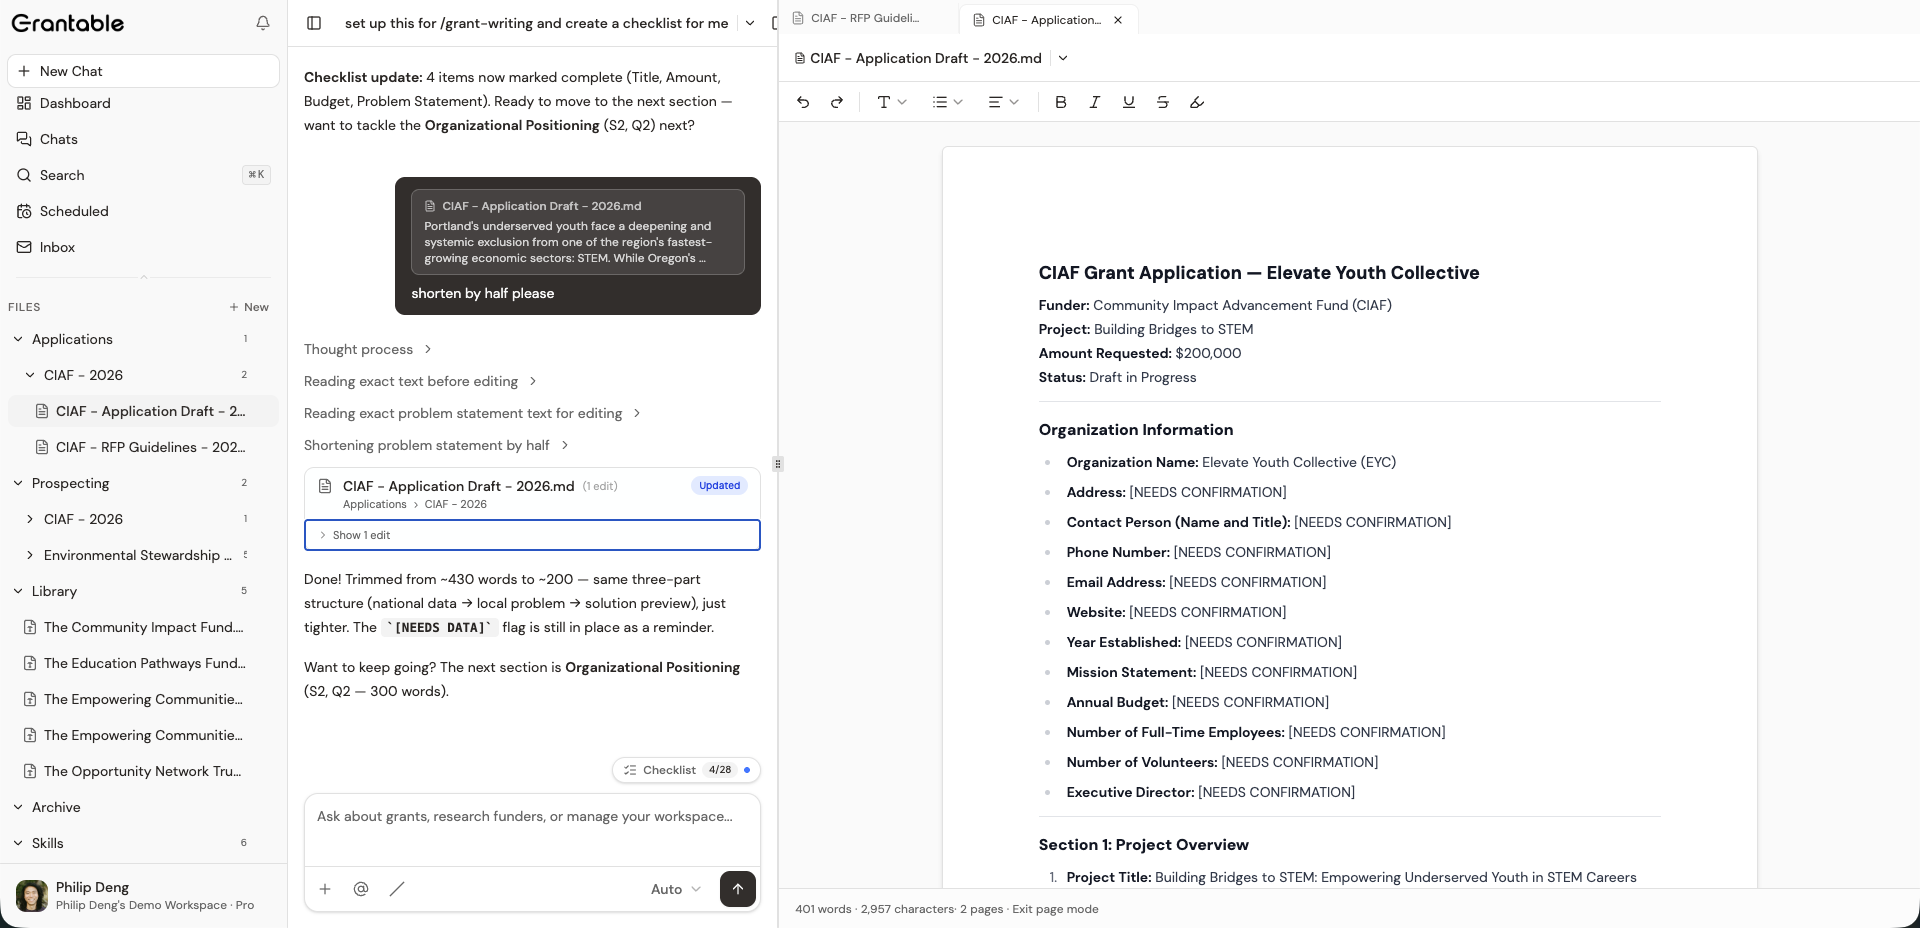
Read the draft. To revise a specific passage, highlight it in the document — the floating action menu appears with Add selection to chat. Click it; the highlighted text becomes a chip above the chat input. Type what you want changed in plain language: “shorten this by half but keep the three-part structure” or “this paragraph is too jargon-heavy for a foundation reader; rewrite for an executive director audience.” The AI revises in place; tracked changes show up in the document so you can see what changed.
Walk down the checklist this way. Each section is its own pass: draft, revise, mark item complete, move on. By the time the checklist is mostly checked, you’ve got a complete proposal in the application folder.
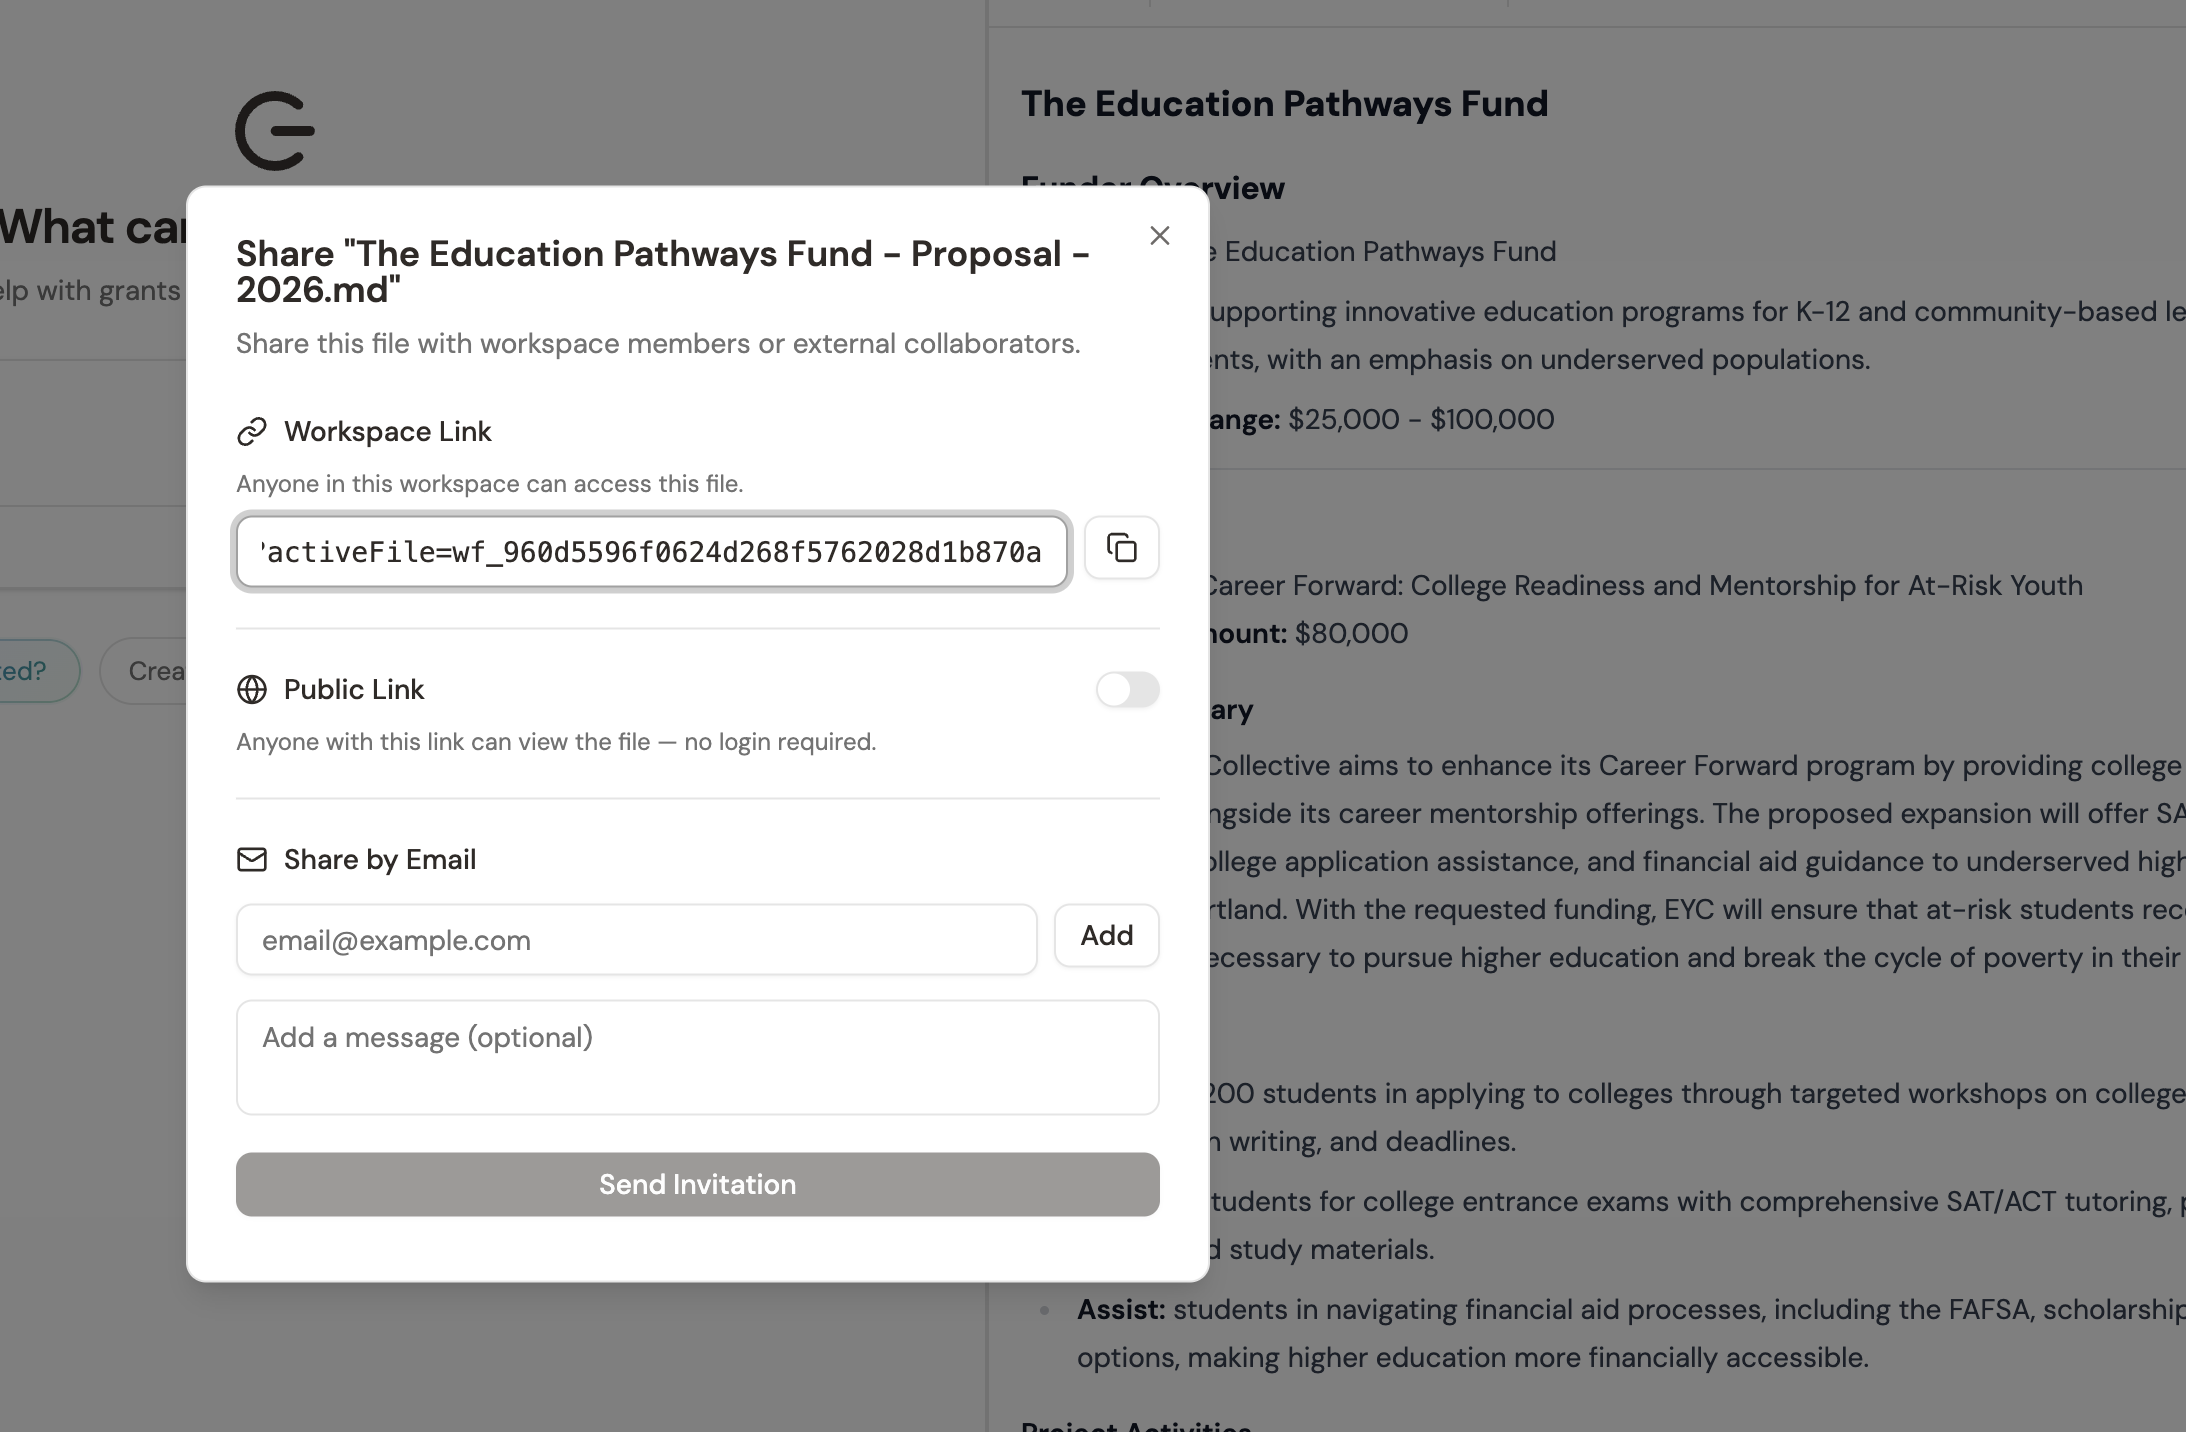
Stage 7: Team review
When the draft is ready for other eyes, share it. For internal teammates who are members of the workspace, just point them to the file — it’s already accessible. For external reviewers (board members, finance director, partner organization), use the share dialog: open the file, click the share icon, and pick public link or send an email invite with optional message text.
For specific feedback, leave comments on passages. Highlight the passage, click the comment icon, write your question, and @mention the right teammate. They get a notification with the comment and the surrounding context — no need to forward a PDF or write “see paragraph 4 of section 2” in an email.
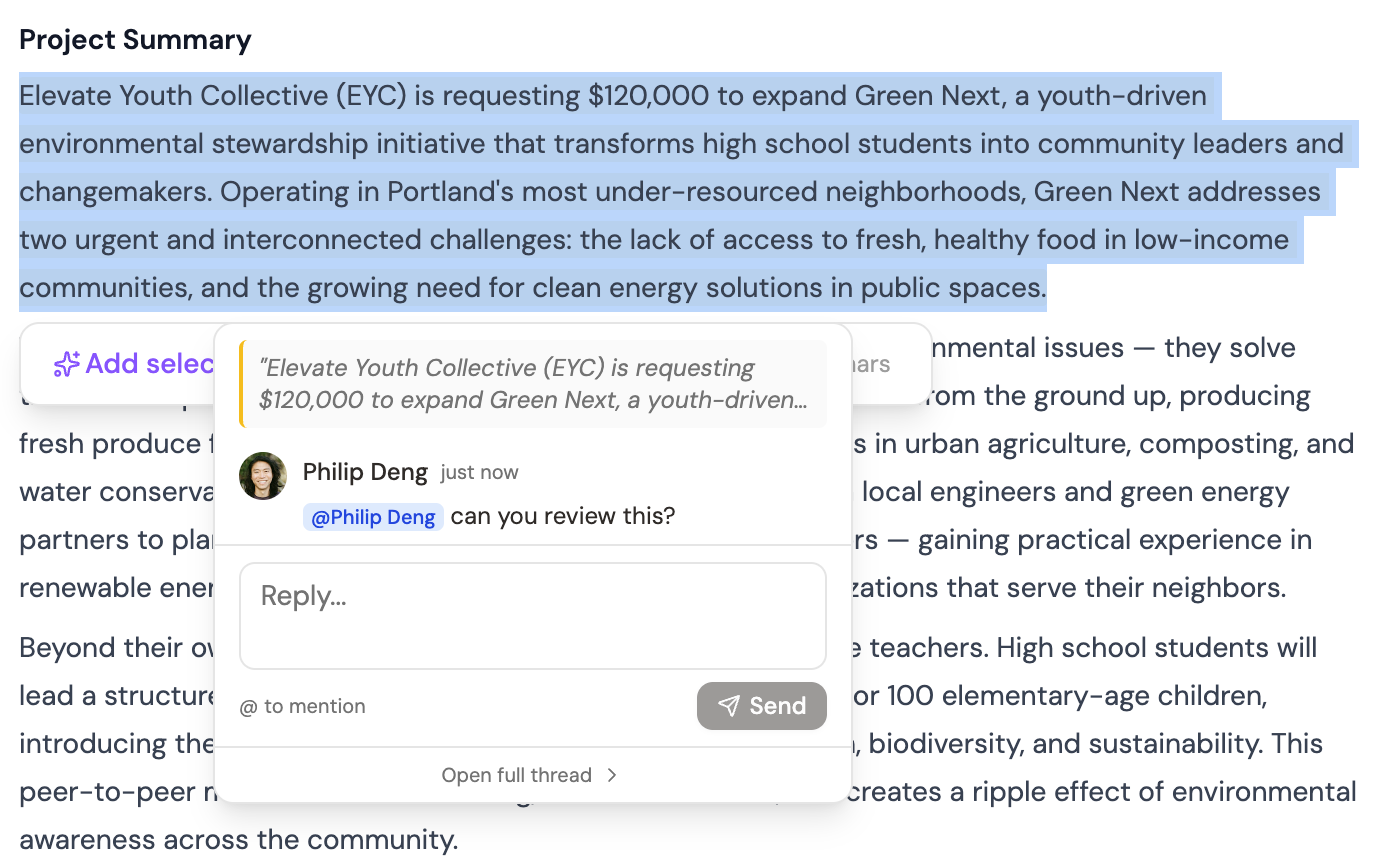
When comments are resolved, mark them resolved. The thread collapses; the document stays clean.
Set a soft deadline for review feedback that’s at least 48 hours before the actual submission deadline. Reviewers respond to the deadline you give them, not the one in the RFP. Building in the buffer is the difference between a calm Friday and a frantic one.
Stage 8: Final pass and submission
Last steps before you submit:
Walk the checklist top to bottom. Every item should be checked. If anything’s still pending, resolve it now — missed attachments are the most common reason proposals get disqualified before review.
Run a final consistency pass with the AI. “Read the full proposal and tell me anything that’s inconsistent — numbers that don’t match between sections, references to outcomes I didn’t substantiate, places where the narrative contradicts itself.” Two minutes; sometimes catches something that would have looked sloppy.
Check formatting against funder requirements. If the RFP specifies word or page limits, use the Show page count toggle in the document footer (it’s a small button at the bottom-right of the editor) to see your current count. If the funder wants a specific font or margin, you’ll be exporting through Word for that.
Export to Word or PDF depending on what the funder accepts. Use Word if they’re allowing track-changes review on their side or if their portal accepts docx; PDF if they want the final locked.
Submit through the funder’s portal (or email, if they’re an old-school funder). Grantable doesn’t submit for you — that final click is human.
Update the dashboard. Open the application’s row in the dashboard and change status to Submitted. Or tell the chat: “Mark the [Funder Name] application as submitted.” The kanban view shifts the card to the Submitted column; the calendar view stops flagging it as upcoming.
You’re done with this one. The whole record — RFP, brief, checklist, drafts, comments, final submission — stays in /Applications/[Year]/[Funder Name]/ for the next person to learn from.
Where the time actually goes
The drafting itself is usually the smallest piece of an application. The biggest pieces are the ones around drafting — extraction, research, version reconciliation — and most of those involve re-collecting information that already exists somewhere.
Grantable compresses the around-drafting work. Not by doing it faster; by not doing some of it at all (the AI did it) and not doing it twice (the workspace remembers).
What stays human:
- The go/no-go. A fit score is data; the call is yours.
- The strategic framing. Why your org is the right fit for this RFP. The angle no other applicant would take.
- The relationship context. What the program officer said on the call, what you learned from the last funded grant, what the board cares about.
- The final read. Does the proposal actually sound like your organization? Is the case airtight? Would you fund it?
The most valuable thing Grantable does isn’t draft faster — it’s keep the context in one place so you don’t spend the saved hours re-collecting it. The AI handles the extraction, the research, the first drafts. The hours you save go into the parts that actually win the grant: strategic framing, relationship context, and the final judgment call. That’s where the human work was always supposed to live; the rest of it was just plumbing.
An RFP just landed on your desktop as a docx. The deadline is three weeks out. What's the first move that pays off most?
- The starting point is usually a docx on your desktop — drop it into a fresh chat and the workflow begins from there
- Always run the fit evaluation before generating anything else; five minutes here saves hours if it's a no-go
- The Grant Opportunity Brief and the checklist are the two artifacts that anchor the rest of the work
- The dashboard entry is the moment solo work becomes shared — don't skip the metadata setup
- Drafting goes section-by-section against the checklist, with revisions through 'Add selection to chat'
- Team review through comments and @mentions; sharing through public links for non-workspace reviewers
- The last click is human — Grantable doesn't submit for you, but it gives you a clean, ready proposal to submit
Next Lesson
This walkthrough started with an RFP that arrived. The next walks the other direction — the proactive pipeline, where you find the funder before they put out an RFP and are ready to apply when they do.
Notice an error or have a question about this lesson?
Get in touchHave questions about this lesson?
Ask Grantable to explain concepts, suggest how they apply to your organization, or help you think through next steps.